Could Not Read From Source Adobe Media Encoder
The Export Settings dialog box in Premiere Pro isn't just a place to name your file and select a location for information technology to exist saved. It is much, much more than than that. Remember of information technology more as a collection of tools that allow you lot to further change and prepare your content for publication. Here are nine of those tools yous can, and should, be using correct now.
Overlays
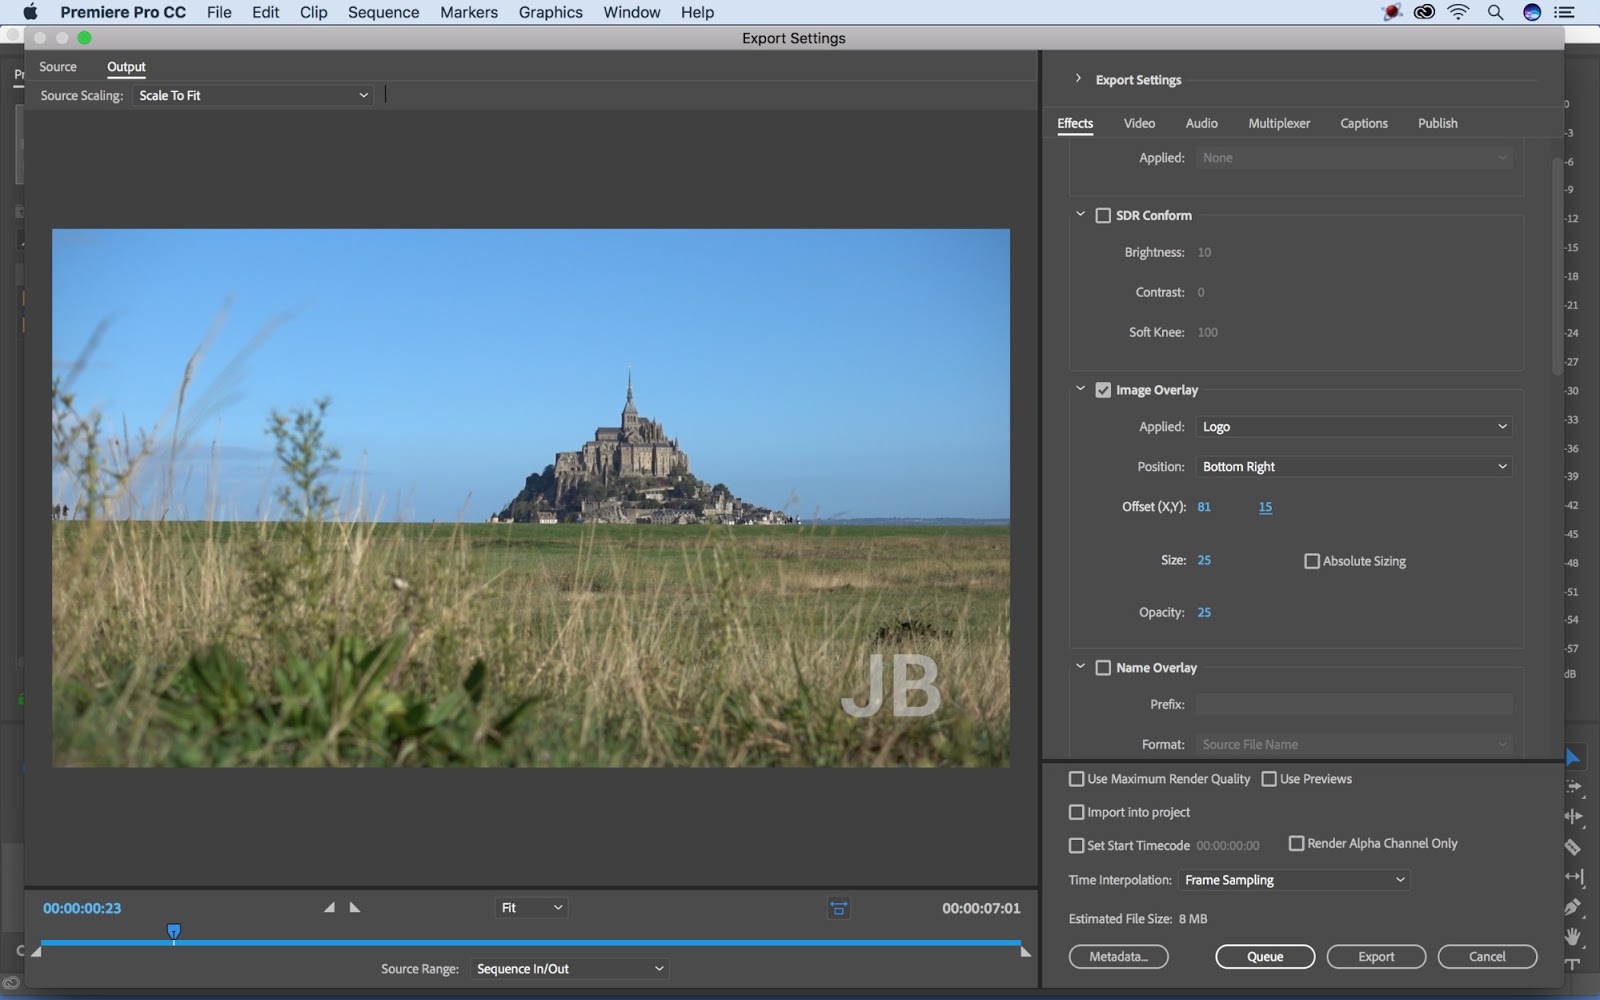
In the Export Settings dialog box, yous can choose to apply three different types of overlays—images, names, and timecode . All of these overlays can exist institute under the Effects tab located only nether the primary Export Settings department.
Epitome Overlays
You can apply image overlays in Premiere Pro to add a watermark to your content or to embed a logo in a corner of your frame to help brand your content. To add together an paradigm overlay, first, check the box and so cull your paradigm via the Applied drop-down menu. Be certain to use a PNG or other prototype file that supports transparency.
Name Overlays
Use proper name overlays to properly characterization and organize your footage. This is helpful when you're working with dailies, or editing footage from a multicamera shoot, etc. These overlays allow you to add together a prefix and suffix, and select how you want the proper noun to be formatted—Prefix and Suffix Simply, Source File Proper noun (with or without extension), or Output File Proper name (with or without extension).
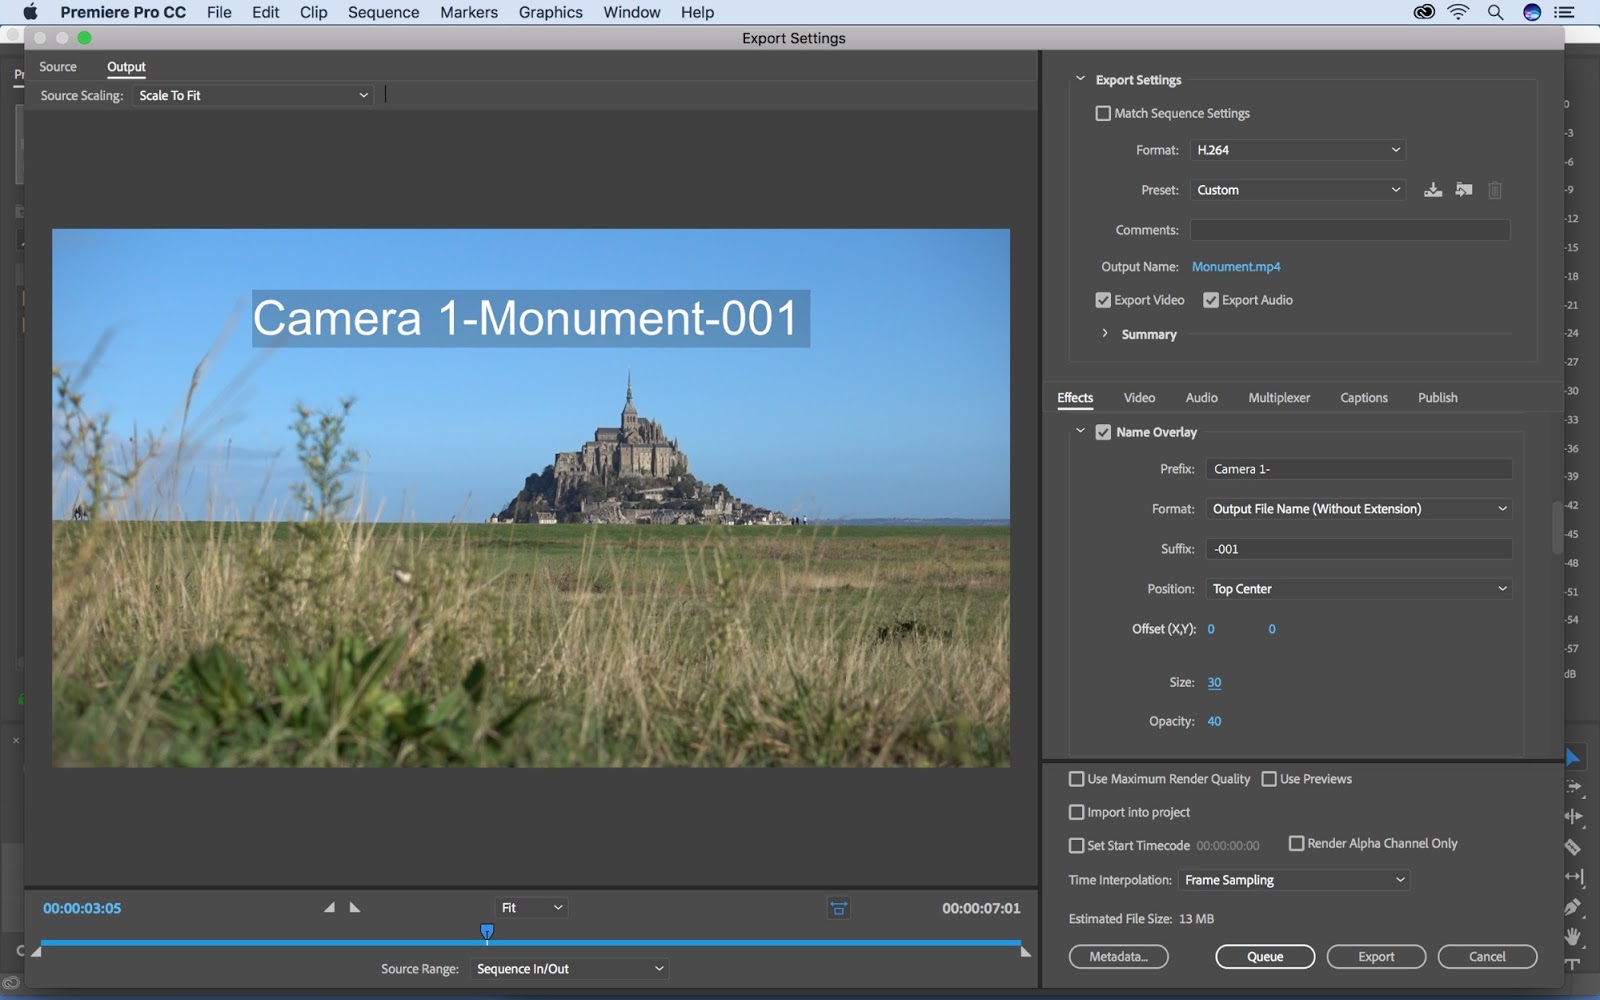
Another practical use case: If I am sharing a temporary file with a client that is definitely not the final version (maybe it just has temp music), I volition put TEMP FOR REVIEW in the lower-right corner. That way, we tin can avert the unfortunate circumstance where a client accidentally publishes the wrong version of the file.
Timecode Overlays
In addition to image and name overlays, you tin as well throw timecode into the mix. That is, if you withal have screen real estate. Specify if y'all desire to use timecode from the source file, or if you'd similar to generate your own. Offset timecode frame past frame if need exist.

Each overlay has position, offset, scale, and opacity properties which permit for complete customization.
Bitrate
To oversimplify, the bitrate settings basically tell Premiere Pro how to clarify your video while encoding/compressing it. This analysis will make up one's mind how much information to keep and how much to throw out.
When it comes to export settings, bitrate is one of the nearly important options you tin can understand. Buried down low in the Video tab, this setting gives y'all control over your image quality and file size.
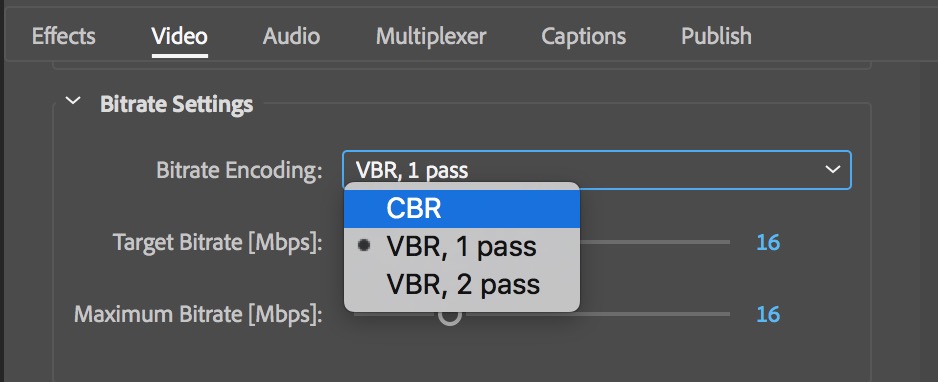
When working with bitrate, yous have two different flavors—variable bitrate (VBR) and constant bitrate (CBR) . The key to choosing a bitrate encoding method depends on how much motility you accept in your video. A lot of motility ways a lot of additional pixels to shrink/encode. Utilise slider bars to adjust the data or "scrap" rate. The higher the bitrate, the more information you keep, and the larger the file size.
While this can seem confusing, it's actually quite simple. Recollect of it as a balancing human activity. You're trying to proceed the quality of the video image high simply with a reasonable and manageable file size. Using a high bitrate will give you lot a better quality image but with a larger file size. Likewise, lowering the bitrate will bring both the quality and file size downward.
Should Y'all Use Variable or Constant Bitrate?
As you might wait and equally the name implies, variable bitrate varies the bitrate during export. When there is less motion in the scene, VBR will discard more data (considering it can do and so without any image quality problems). When more movement takes place, it will raise the bitrate automatically. This helps maximize the file quality/size ratio.
You can perform an even more precise encode past using VBR 2 Pass. As this name also implies, 2-pass VBR involves Premiere Pro going through the video twice. The beginning pass looks at the video to determine the best bitrate to utilise based on motion, colour, etc. Then information technology's during the 2d pass when the pinch is applied. During a 1-pass VBR, Premiere is making the bitrate decisions on the fly. VBR two Laissez passer will give you a more precise pinch, but it volition take longer.
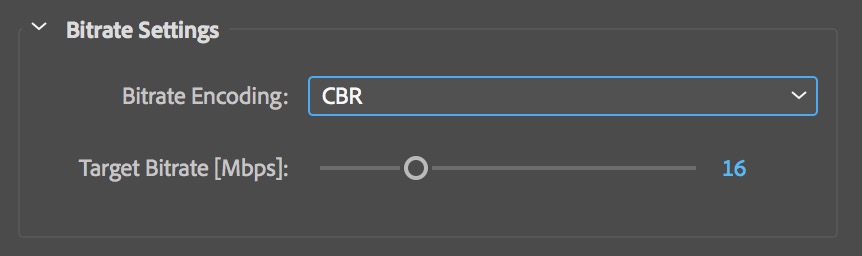
Both the 1-Laissez passer and 2-Pass options include a Target and Maximum Bitrate slider bars. This bitrate setting is best used when there is a lot of move in your clip.

CBR uses the same bitrate throughout the export, regardless of what is happening in the frame. It doesn't thing if there's a lot of motion, or no motility at all—the bitrate stays the aforementioned. Again, a high CBR will preserve data, a lower rate will remove data. Abiding bitrate is all-time suited for video with piddling move, like interviews.
We've only scratched the surface of Premiere Pro's compression settings here. For a detailed walkthrough of each of the compression options, cheque out this video:
And for a detailed explanation of how codecs work, check out this one:
Upload to Youtube
The Publish tab of the Export Settings dialog box has a number of interesting features. In this section, Premiere allows y'all to automate an upload to popular video sharing websites, including Youtube and Vimeo. In one case fix, your video will automatically upload during the export process.
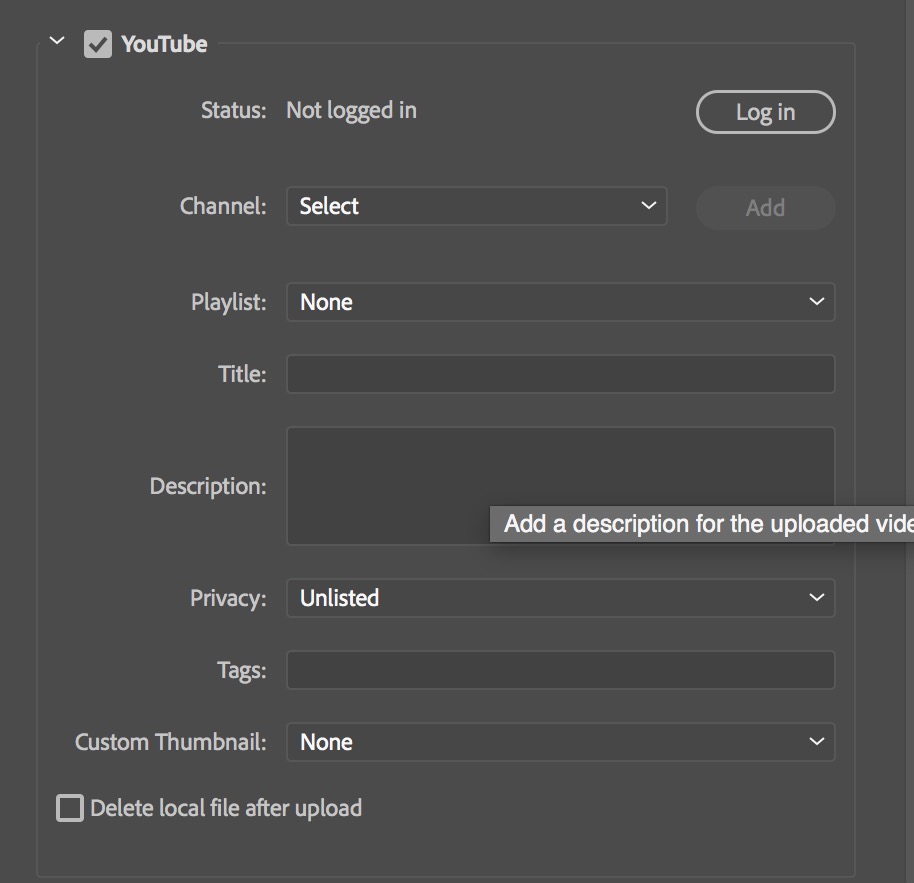
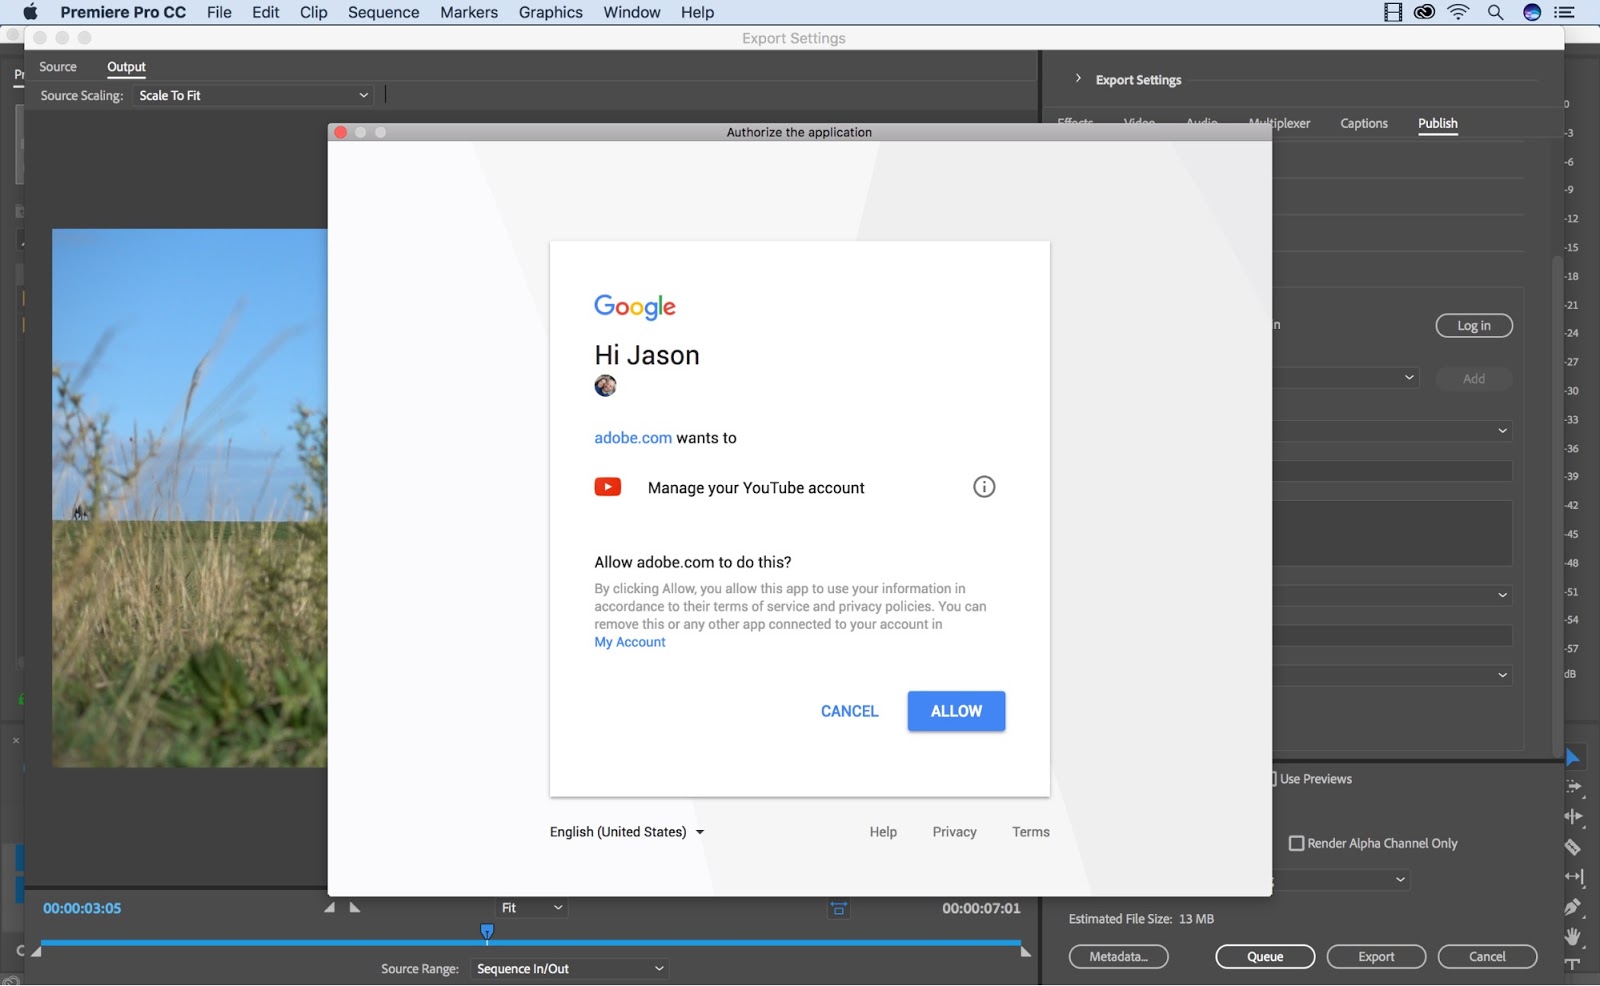
To ready an automated upload to Youtube, I first need to check the Youtube box under the Publish tab. Next, I'll log in to my account and give Adobe Media Encoder permission to upload directly to my Youtube page. Since I accept multiple Youtube channels, Premiere gives me the option to specify which i I desire to upload to. Also, Adobe's latest release now gives me the option to add a custom video thumbnail when publishing to YouTube.
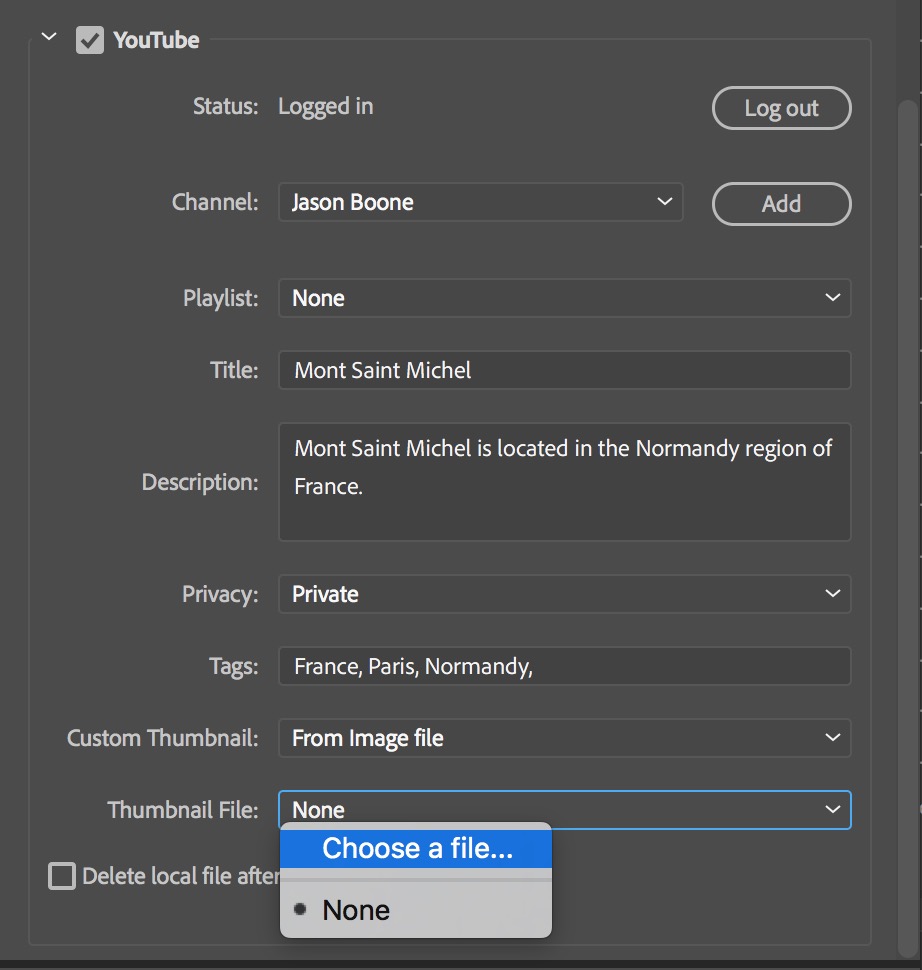
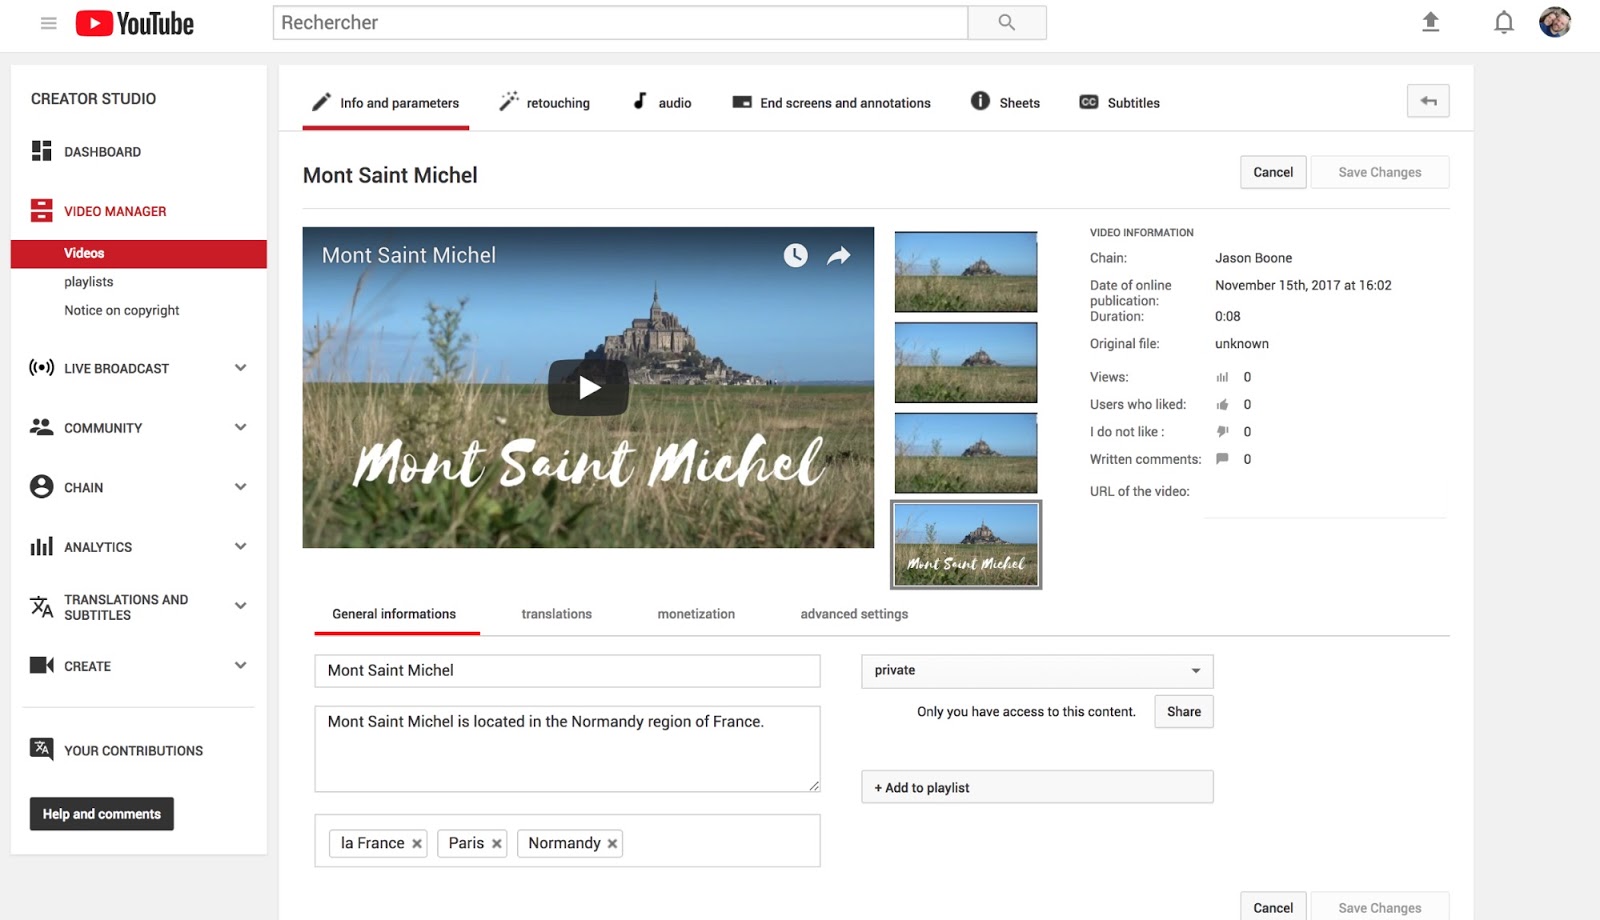
Now all I demand to do is add a title, description, tags, and conform the privacy settings, and then my video will exist prepared for upload. Every bit long as I keep the Youtube box checked, the video will automatically upload to my channel during the consign procedure. Finally, yous can even take Premiere delete your file off of your local drive afterward the upload is complete.
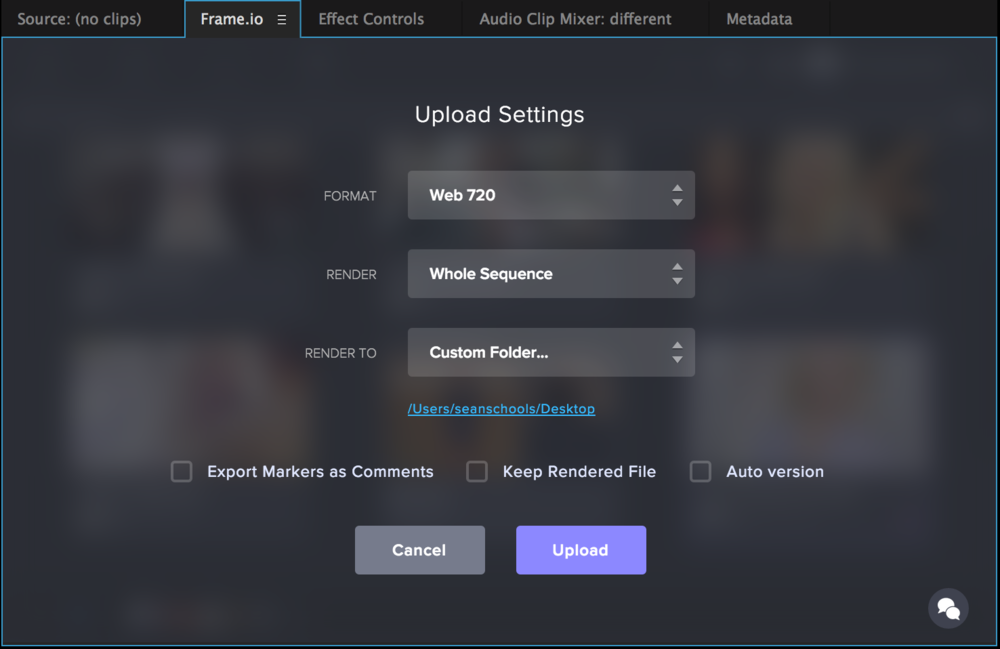
If y'all're a current Frame.io user and uploading a draft for review, then you're in luck. The Frame.io Premiere Panel does the whole job in one click, encoding your video, uploading it to Frame.io, and notifying your collaborators.
Share to Social Media
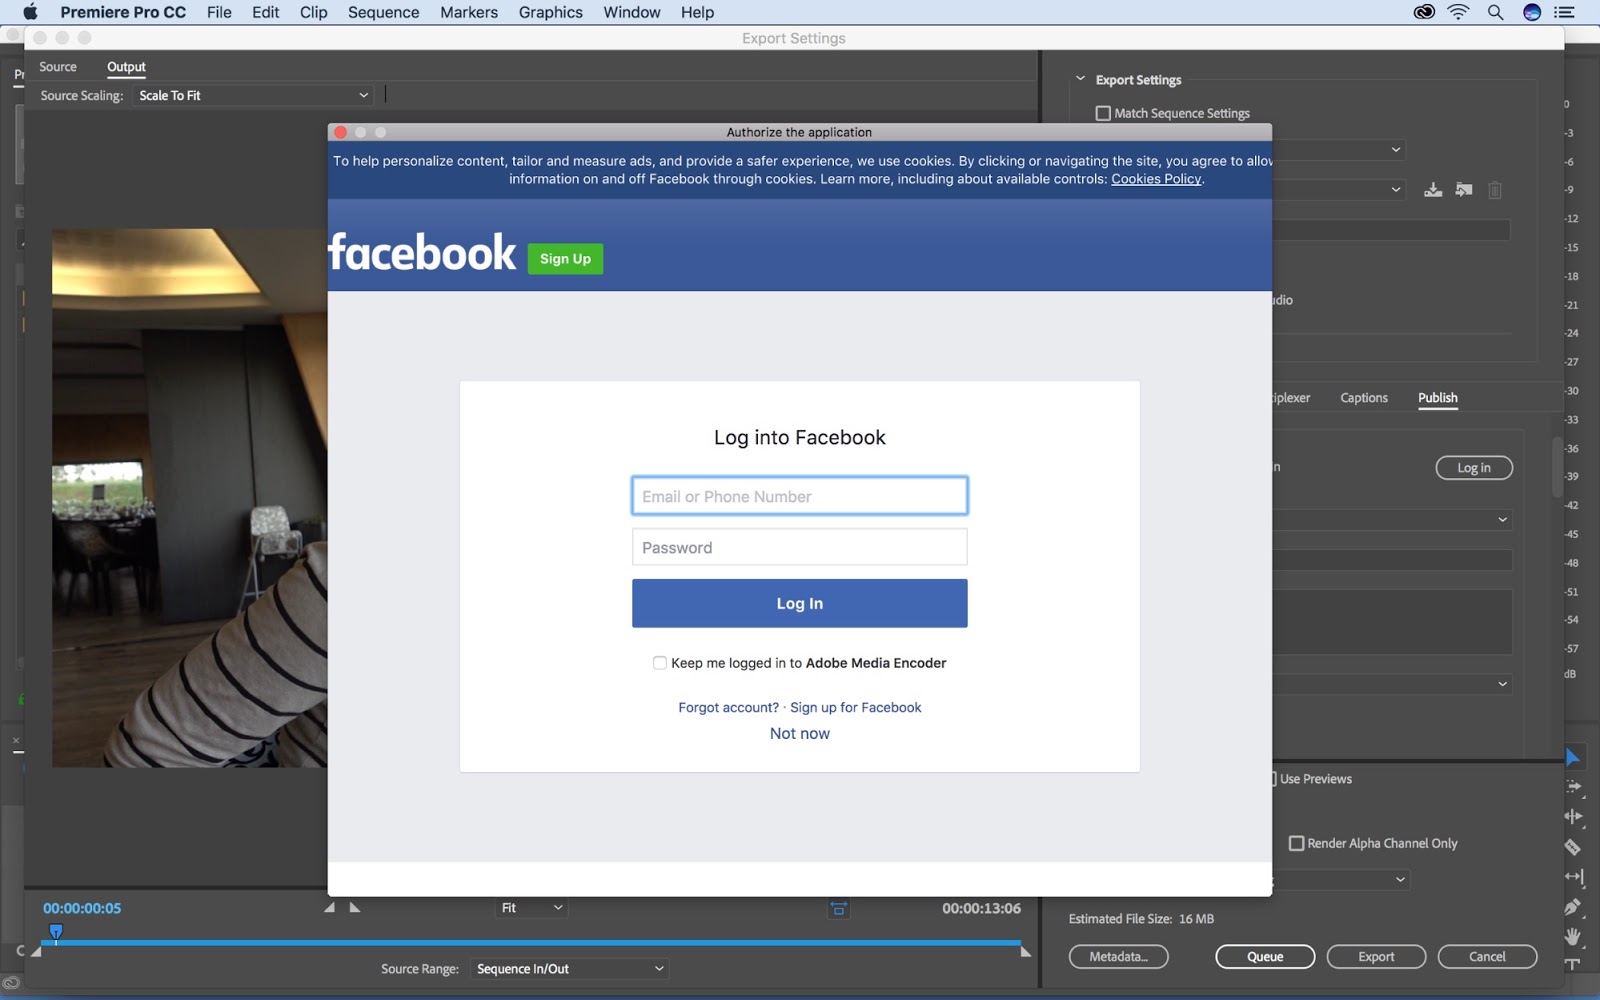
In addition to automating an upload directly to Youtube and Vimeo, you can also share your content straight to other social media sites. In detail, Premiere Pro has upload settings for Facebook and Twitter.

To automate an upload straight to Facebook, select the Facebook checkbox under the Publish tab. Just as with Youtube, you'll need to login to your Facebook business relationship and give Adobe Media Encoder permission to share.
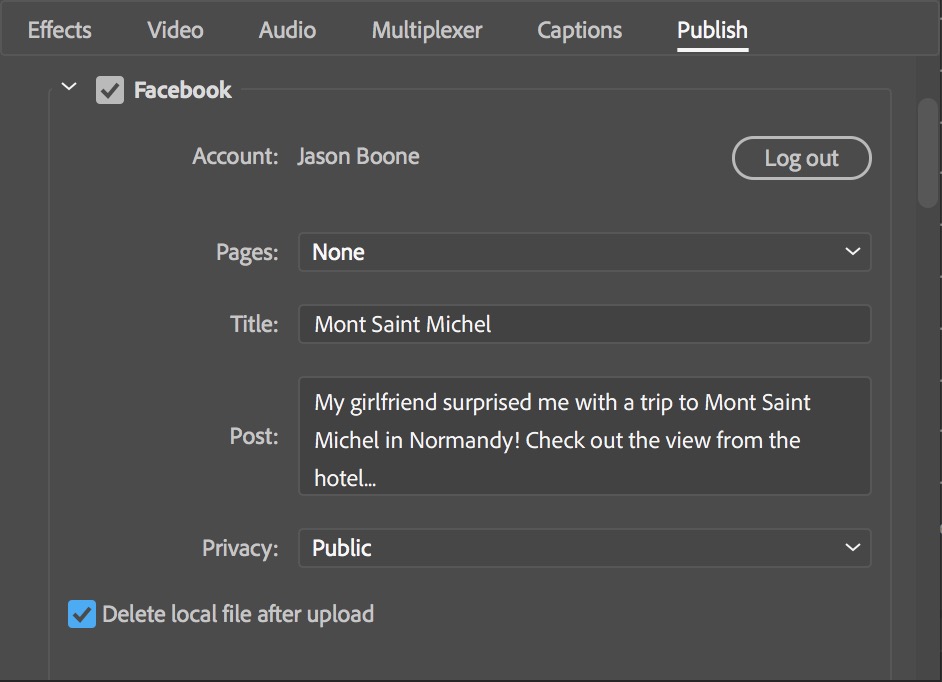
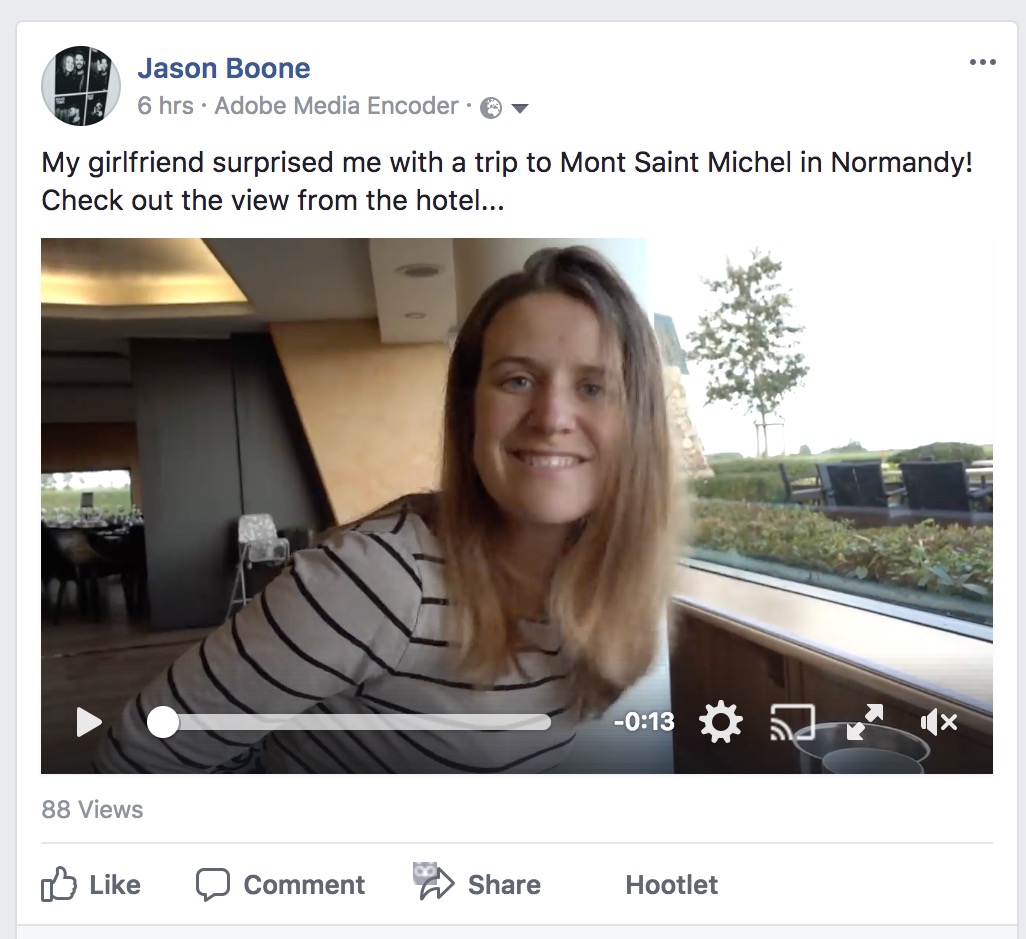
You can have your video uploaded straight to your principal Facebook page, or to a page you manage. Requite your video a title, write a mail service, and select your privacy settings. These settings include private, public, all friends, and friends of friends. As in the instance with the YouTube upload, you can select whether or not to have Premiere delete the local file. Now your video will automatically upload every bit part of the consign process.
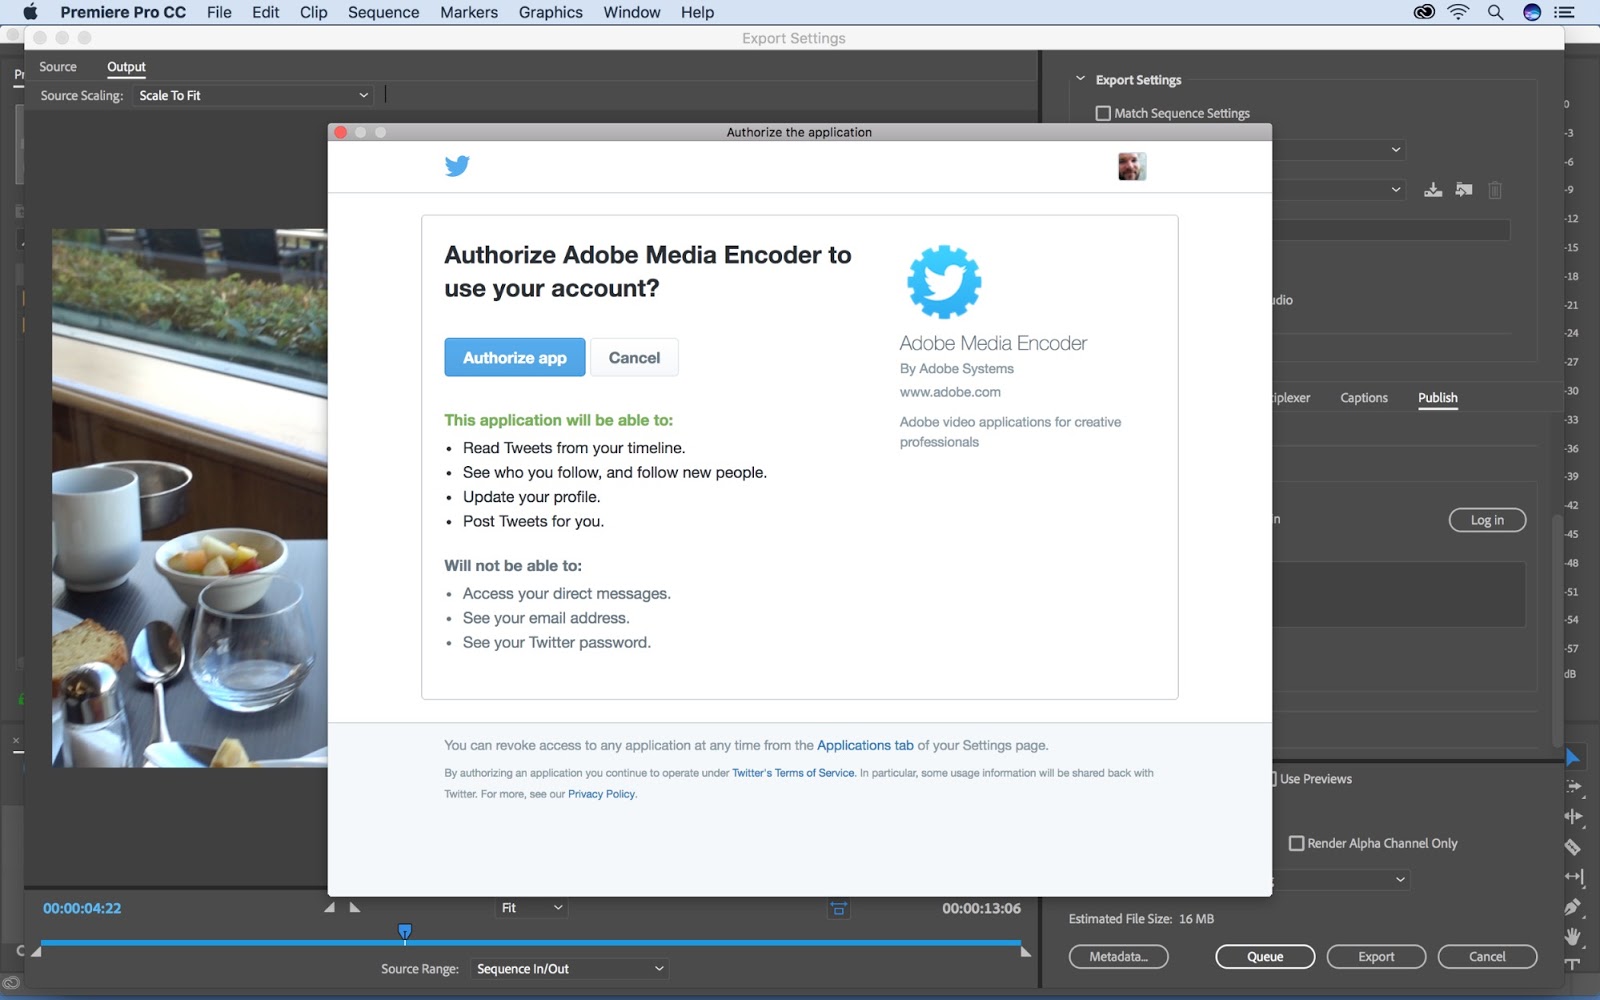
The same automation settings be for Twitter. Simply select the checkbox under the Publish tab, login to your Twitter account, requite Adobe Media Encoder permission and add a status. As long as y'all are logged in and the Twitter checkbox is selected, your video will be automatically uploaded to Twitter during the export.

Crop the Source
I've used Premiere Pro for more than ten years at present, and I must confess that I've just recently discovered the crop tools within of the Export Settings dialog box. This is probably due to the fact that these features are hidden away under the Source tab, which is all the way in the upper left mitt side of the console. Use the ingather tools in conjunction with Source Scaling in the Output tab to gain tight command over your image.
After selecting the crop button you'll be provided with a variety of options. You can manually adjust your ingather in the monitor via a bounding box. As y'all adjust the ingather, a tooltip will provide you with updated dimension data. Blazon in specific crop amounts at the height of the panel, and even select from a number of preset ingather proportions.
These tools let you to crop the source—you're not changing the actual dimensions of the output. You tin can specify how you lot want the crop to be handled past further adjusting Source Scaling settings in the Output tab, which I'll discuss in the next section.

The crop tool is dandy for creating varying versions of a sequence, for instance if you lot're exporting to different social media platforms . Prior to finding these crop tools I would inefficiently go back into my original sequence and scale my content appropriately. Other times I would create duplicate sequences depending on how many unlike versions I needed. Using the crop tools in the Export Settings dialog box allows me to skip all of these steps.
In addition to creating multiple versions of a sequence, you tin besides utilize crop tools for artistic purposes such equally faking a widescreen look with horizontal black bars.
Scale the Source
Whatever fourth dimension you utilize the crop tools in the Source tab, you'll be given options on how to scale the cropped content in the side by side Output tab. Allow's say, for instance, that I want to slightly ingather a clip to adjust the framing. Once cropped, I at present have four different Source Scaling options bachelor in the Output tab—Scale to Fit, Scale to Fill, Stretch to Fill up, and Scale to Make full with Black Borders. Take a look at the different results for each.
I can too use Source Scaling if I determine to output my video at a different resolution. As another instance, let'southward say that I want to quickly export this 16:9 prune with an aspect ratio of i:1, which is a perfectly square clip. To do this, I'll go to my Basic Video Settings and modify the Width of my frame to 1080. Since my source is 1920×1080, changing the width volition make information technology 1080×1080, giving me a perfect foursquare.
By default the Source Scaling is gear up to Scale to Fit, which will scale my prune downwards, leaving large blackness confined at the top and bottom of the epitome. To remove these I can simply modify the Source Scaling to Calibration to Fill.
Metadata
Premiere Pro has plenty of metadata options when y'all're preparing your consign. There is a metadata button at the lesser of the dialog box, just adjacent to the Queue push. Clicking this push button will launch the Metadata Export dialog box.

Hither you lot tin can specify how you desire to handle existing metadata—y'all can embed it in the output file, export it as a sidecar file, or both. Or, you can cull to non include the metadata at all. You can even include Master Voice communication Text and Sequence Markers.
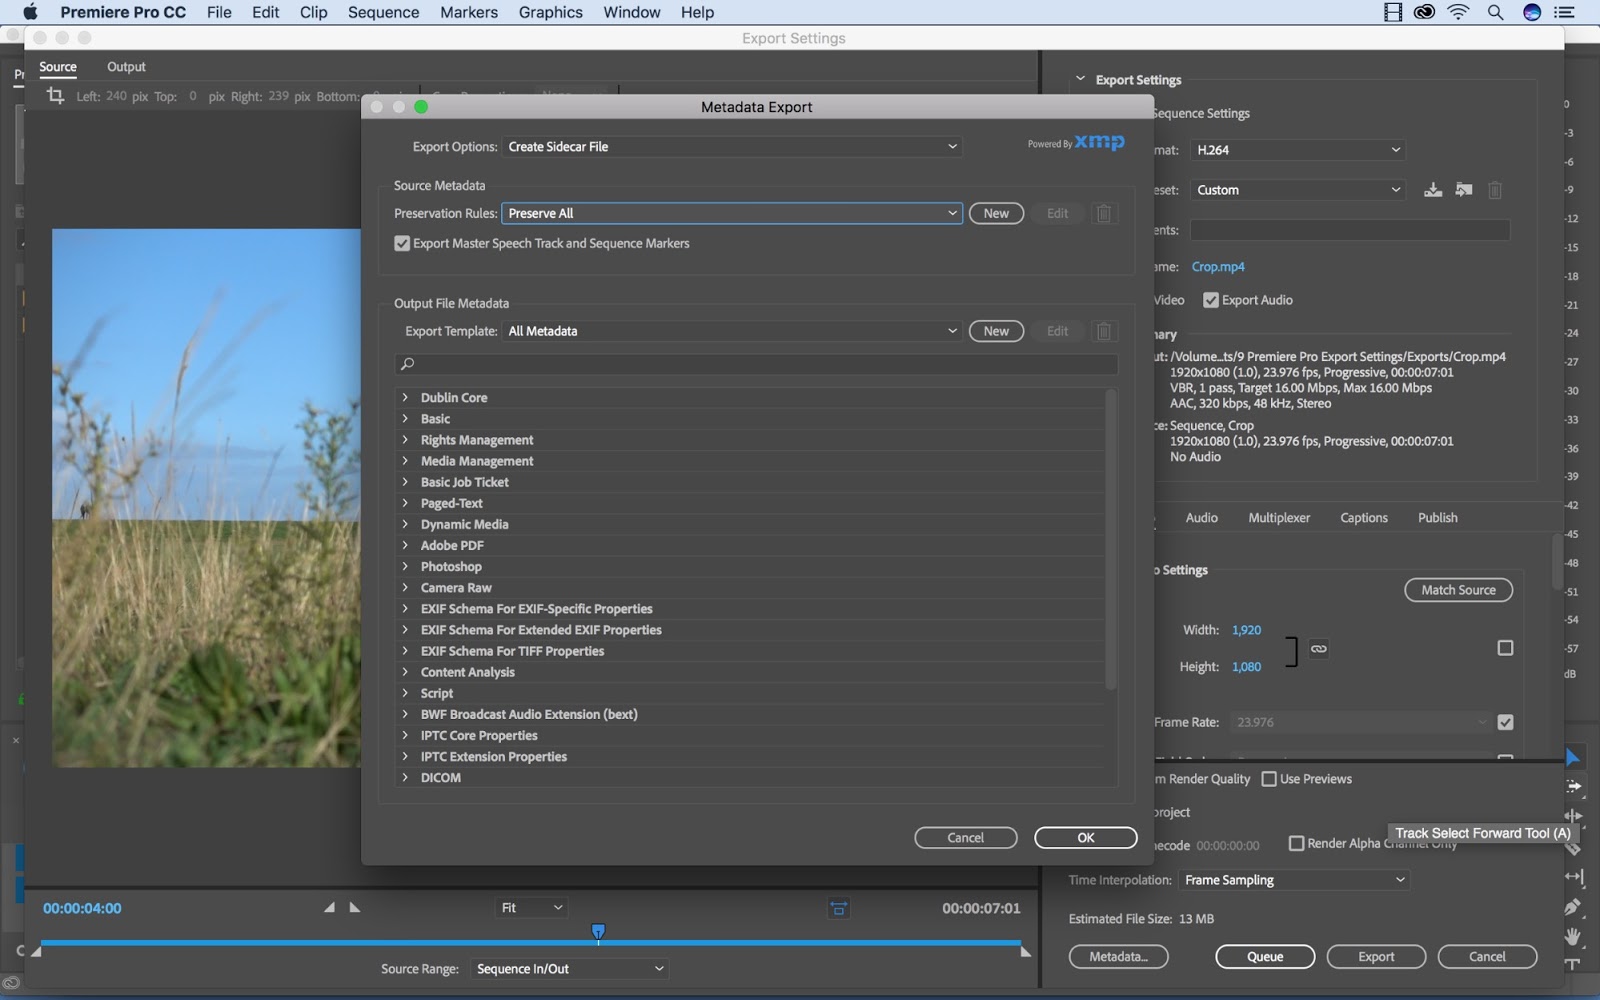
If you want to completely overwrite existing metadata or just add together a few new things, you accept plenty of choices in the Output File Metadata department. Yous tin even customize your ain Export Template if you desire to get really specific. One time exported, you'll exist able to read the diverse metadata in Premiere'south Project Panel or in media asset management programs like Adobe Bridge.
You lot'll want to pay close attention to this panel if you're handing assets off for color correction or VFX work. Another common use example would exist to add together copyright data to the metadata, if you're worried about people stealing your material and passing information technology off as their ain. Of grade, they can always remove your copyright info from the metadata, but most people aren't smart enough to practice that.
Presets
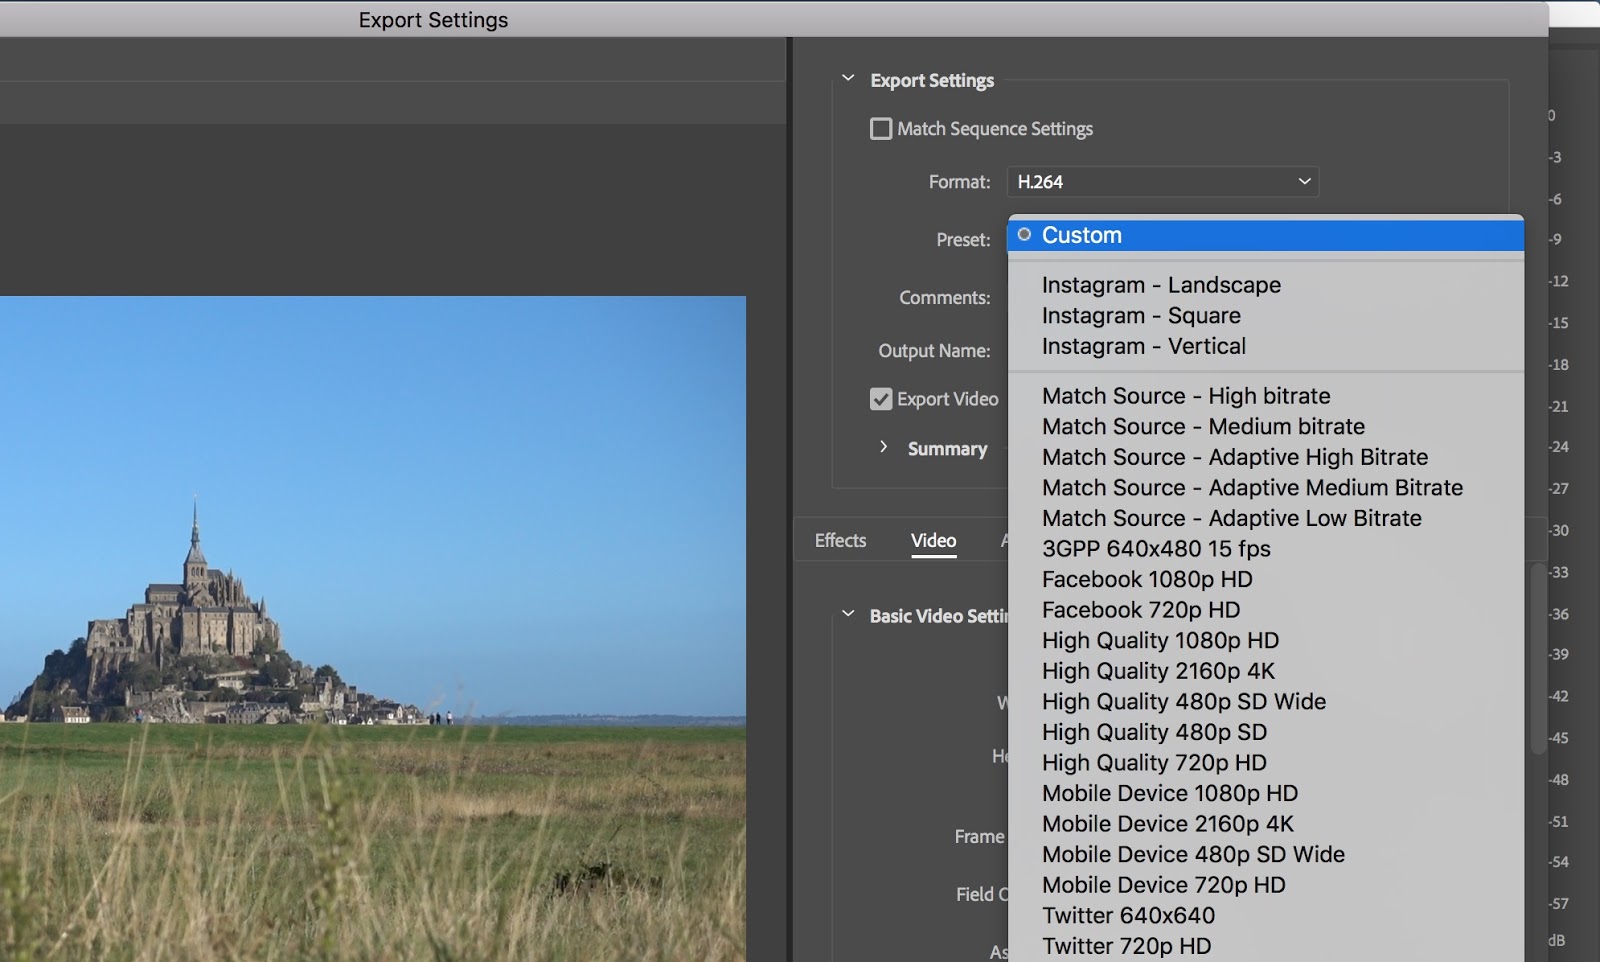
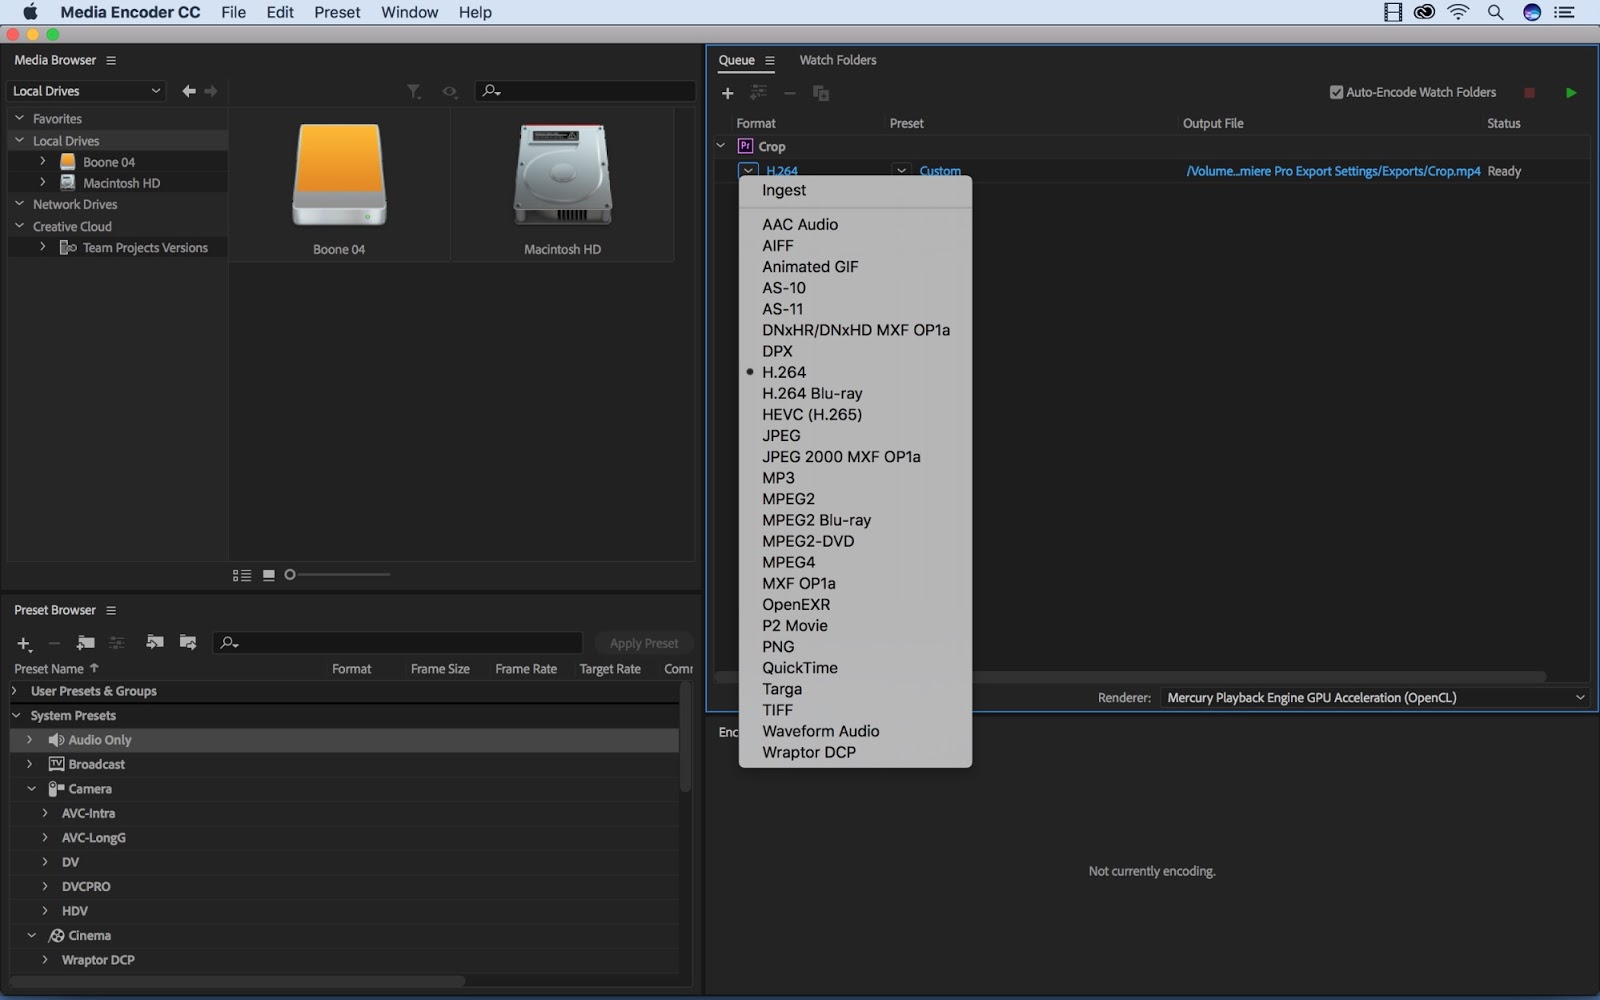
Presets are designed to save you lot time. They automatically choose the best settings based on a desired platform. Premiere has a diversity of export presets, especially for the popular H.264 format. These include presets for Facebook, Twitter, Vimeo, Youtube, and a scattering of others. You can find them past get-go selecting a format and then clicking on the Presets driblet-down card.
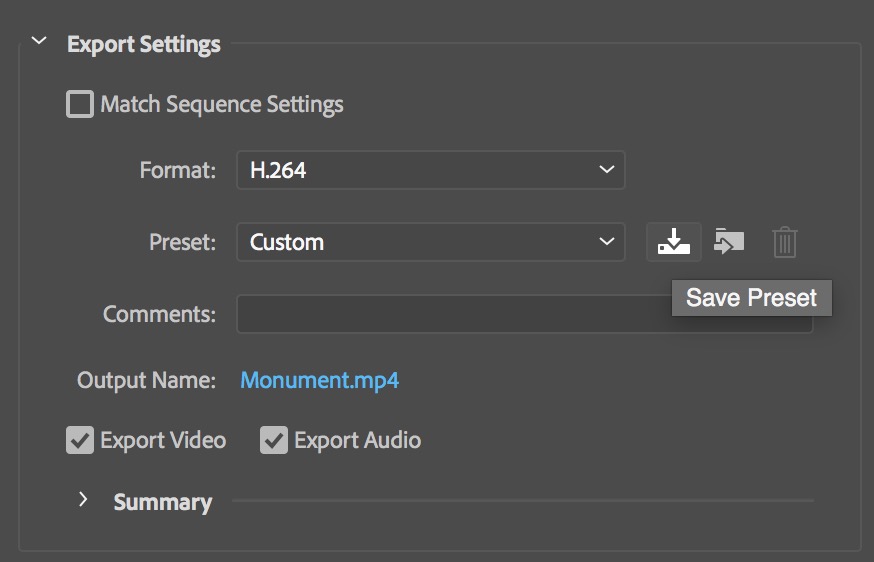
The real power comes in creating your own export presets. To do this, just make all of the necessary export setting adjustments and and then select the Relieve Preset button but to the right of the Presets drop-down menu. You can include Effects and Publish settings in your custom preset. This means that all of the overlays and upload automations yous read about earlier can be saved in a preset. Very cool stuff.
If you lot use Frame.io's pop Premiere Pro Panel, you'll run across a place to specify a custom preset there. That would let you to add a watermark to every video you upload to Frame.io, for instance.
I recently created 3 different consign presets for Instagram. These include settings for landscape, square, and vertical aspect ratios. Lookout the settings automatically modify as I switch between the presets.
Queue
If you aren't familiar with this feature then I'thousand afraid to inform you that you've been wasting massive amounts of time. Exporting via the Queue will send your sequence over to the Adobe Media Encoder, a completely separate awarding specifically designed to encode and process your content.

Just as with the Export Settings dialog box, you tin can change the format settings, apply a preset, and specify the location of your output file. You lot tin even duplicate your content inside of Media Encoder then that you can speedily output to several different formats simultaneously.
The real benefit of using the Adobe Media Encoder is the fact that you can go on editing in Premiere Pro while the export is taking identify. You lot can keep queueing up every bit many sequences as you'd like, even while one is processing within of the encoder. If you lot use the standard export feature from the Export Settings dialog box, you volition tie up your organisation until the consign is finished.
Media Encoder even does this magical thing where it temporarily pauses whenever yous starting time playing back the timeline in Premiere (to give Premiere all of the computer's resources) and then instantly begins again when you lot hitting pause. This means that you actually can edit and export at the same time without serious performance problems.
These 9 settings are just the tip of the iceberg when it comes to exporting your videos from Adobe Premiere Pro. I encourage you to open up upward the Export Settings dialog box and poke around. Peruse the various tabs and experiment with various settings. You'll be saving time in no fourth dimension. 🙂
contrerasagrapper.blogspot.com
Source: https://blog.frame.io/2017/11/22/9-premiere-pro-export-settings/
0 Response to "Could Not Read From Source Adobe Media Encoder"
Post a Comment